Installation
Below is the guide for first time installation and upgrade
Once you have installed APERO you can read about running APERO here.
Note
A Guide for installing python can be found here
Download from GitHub
Change to your desired installation directory (from now on this is referred to
as DRS_ROOT) e.g. /home/user/bin/apero-drs/
Clone
Clone from github
git clone git@github.com:njcuk9999/apero-drs.git
Choose branch
Change to the {DRS_ROOT} directory
Choose which branch:
- main version
This is the version currently recommended for all general use. It may not contain the most up-to-date features until long term support and stability can be verified.
Change to this branch with
git checkout main
git pull origin main
- developer version
Note the developer version should have been tested and semi-stable but not ready for full sets of processing and definitely not for release for non-developers or for data put on archives. Some changes may not be in this version that are in the working version.
Change to this branch with
git checkout developer
git pull origin developer
- working version
Note the working version will be the most up-to-date version but has not been tested for stability - use at own risk.
Change to this branch with
git checkout working
git pull origin working
Prerequisites
APERO is coded using python 3
Currently we recommend python 3.9 (however 3.7 and 3.8 are supported).
Please do not use python 2 with APERO.
Please use the requirements file to install the exact required modules i.e. from the git hub directory
pip install -r requirements_current.txt
Note
Some developer tools require additional modules. Please use the requirements_developer.txt for these (This can be done at any time after the installation process to use the tools).
Warning
Please make sure you are in the correct environment (especially if using conda). If using conda it is worth doing a which pip to make sure your pip is installing the python modules to the correct environment (and not, for example, your base or system environment).
Setup
Possible pre-installation step
When doing a full reduction it may be useful to have a static raw directory (e.g. if a raw directory has files coming in from observations / synced to other servers).
For a static full reduction it is preferable not to add new raw files during processing (i.e. it requires time to update database, templates could need to change with new observations etc)
For this reason a script copyraw.py exists i.e.
python setup/copyraw.py --indir /path/to/full/raw/dir --outdir /path/to/new/symlink/dir --do_symlink
By default it create symlinks but these can be turned off and hard copies can be created with the following:
python setup/copyraw.py --indir /path/to/full/raw/dir --outdir /path/to/new/symlink/dir --do_copy
Run the installation script
Change to the {DRS_ROOT} directory
Run the installation script
python setup/install.py --name={PROFILE}where {PROFILE} is a short descriptive name for a setup (you can have multiple profiles with one installation)
e.g.
python setup/install.py --name=setup_njc_200903
Step-by-step guide
Follow the step-by-step guide:
A: User configuration path
This is the path where your configuration will be saved. If it doesn’t exist you will be prompted to create it. (This will be referred to as DRS_UCONFIG from now on (default is
/home/user/apero/PROFILE)B: Instrument settings
Install INSTRUMENT. If yes it will install the instrument if not then it will not install the instrument. Currently only SPIRou is supported
C: Set up paths
The first question will ask whether to set up paths individually. If [Y]es it will allow you to set each path separately (i.e. for raw, tmp, reduced, calibDB etc). If [N]o you will just set one path and all folders (raw, tmp, reduced, calibDB etc)) will be created under this directory.
D: Setting the directory/directories
Will prompt you to enter the directory path/paths (will ask you for each if you answered that paths be set up individually in step C above.
E: Clean install
If you type [Y]es you will be prompted (later) to reset the directories this means any previous data in these directories will be removed. Note you can always say later to individual cases.
Warning
Resetting a directory will remove all files/sub-directories from within these folders
Note
A to E will repeat for all installable instruments (To step up just one use the –instrument argument
Activating the APERO profile
To activate an apero profile you need to source the {DRS_UCONGIG}/{PROFILE}.{SYSTEM}.setup script.
Details of this should be in green at the end of the installation process
i.e. for bash:
source {DRS_UCONFIG}/{PROFILE}.bash.setup
i.e. for tcsh/csh/sh
source {DRS_UCONFIG}/{PROFILE}.sh.setup
e.g. with bash and our example profile above:
source {DRS_UCONFIG}/{PROFILE}.sh.setup
We strongly recommend setting up a alias for this
i.e. for bash (i.e. in ~/.bashrc ~/.profile or ~/.bash_aliases):
alias {PROFILE}="source {DRS_UCONFIG}/{PROFILE}.bash.setup"
i.e. for tcsh/csh/sh (i.e. in ~/.tcshrc, ~/.cshrc etc)
alias {PROFILE} "source {DRS_UCONFIG}/{PROFILE}.sh.setup"
Note
This must be done every time one wishes to use APERO (and must be done after one activates the conda environment
conda activate apero-env
One could add these both to automatically happen in a ~/.bashrc but
we recommend activating each time.
Following on from typing this command you should see a splash screen validating the installation and letting you know everything is good to run APERO recipes and tools.
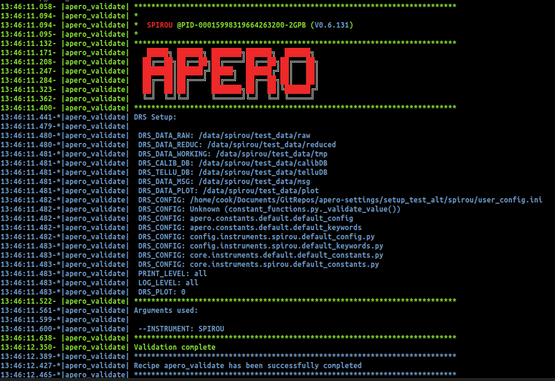
For details about the splash screen click here.
Updating from github
The cleanest way to update is to create a new conda environment and install as above, however this will require a complete re-reduction (recommended but could take a long time), therefore you can use the following steps to update your current conda environment and APERO installation.
Choose a branch (as in Choose branch)
Update the branch (pull from github)
git pull origin {branch}
Update the requirements
pip install -r requirements_current.txt
or if are working in developer mode
pip install -r requirements_developer.txt
- Note that lbl will not currently update with this command to install lbl
use the following command
pip install git+https://github.com/njcuk9999/lbl.git@main --upgrade
or if are working in developer mode
pip install git+
Make sure you are in an APERO profile
source {DRS_UCONFIG}/{PROFILE}/setup.bash.setup
or if you have it aliased
{PROFILE}
e.g.
source /home/user/apero/setup_njc_200903/setup.bash.setup
or if you have it aliased
setup_njc_200903
Update using the installation script
python setup/install.py --update
This will use all current settings and update the